Using the cf CLI with a proxy server
Page last updated:
If you have an HTTP or SOCKS5 proxy server on your network between a host running the Cloud Foundry Command Line Interface (cf CLI) and your API endpoint, you must
set the https_proxy variable with the hostname or IP address of the proxy server. The https_proxy environment variable holds the hostname or IP address of the
proxy server.
The https_proxy variable is a standard environment variable. As with any environment variable, the specific steps used to set it depends on your operating
system.
Format of https_proxy
The https_proxy variable is set with hostname or IP address of the proxy server in URL format, as shown in the following example:
https_proxy=http://proxy.example.com
If the proxy server requires a username and password, you must include the credentials, as shown in the following example:
https_proxy=http://username:password@proxy.example.com
If the proxy server uses a port other than 80, you must include the port number, as shown in the following example:
https_proxy=http://username:password@proxy.example.com:8080
If the proxy server is a SOCKS5 proxy, you must specify the SOCKS5 protocol in the URL, as shown in the following example:
https_proxy=socks5://socks_proxy.example.com
The cf ssh command for cf CLI v7 does not work through a SOCKS5 proxy. cf CLI v7 is out of support; you must be running cf CLI v8.
Set https_proxy in macOS or Linux
To set the https_proxy environment variable in macOS or Linux:
Use the command specific to your shell. For example, in bash, use the
exportcommand, as shown in the following example:export https_proxy=http://my.proxyserver.com:8080To make this change persistent, add the command to the appropriate profile file for the shell. For example, in bash, add a line similar to the following example to your
.bash_profileor.bashrcfile:https_proxy=http://username:password@hostname:port export $https_proxy
Set https_proxy in Windows
To set the https_proxy environment variable in Windows:
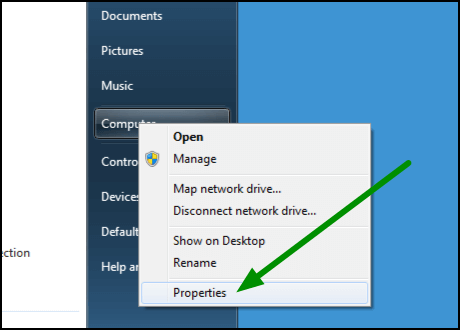
Open the Start menu.
Right-click Computer and select Properties.
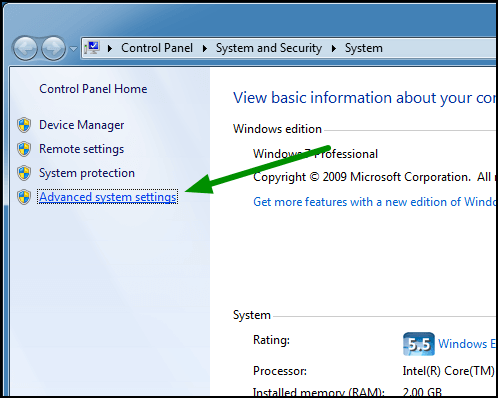
In the left pane of the System window, click Advanced system settings.
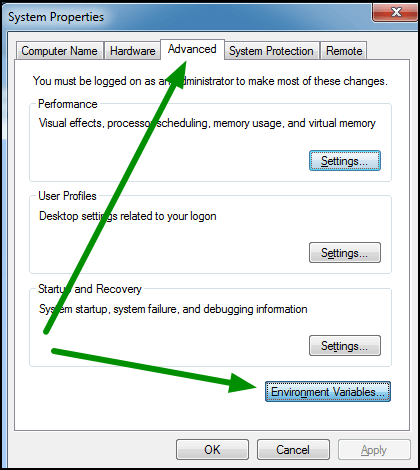
In the System Properties window:
- Select Advanced.
- Click Environment Variables.
Under User variables, click New.

For Variable name, enter
https_proxy.For Variable value, enter your proxy server information.
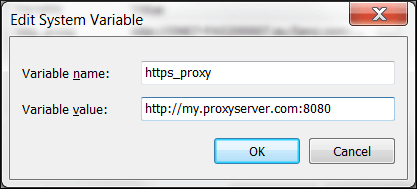
Click OK.